为了防止原文消失或者被墙,转载留个底,最好还是去看原贴,因为随着版本变化,原贴是有人维护升级的
http://www.pyimagesearch.com/2015/06/22/install-OpenCV-3-0-and-Python-2-7-on-ubuntu/
Last week we kicked-off the opencv 3.0 install fest by detailing how to install OpenCV 3.0 and Python 2.7+ on the OSX platform.
Today we are going to continue the OpenCV 3.0 install instruction series by moving over to the Ubuntu operating system.
In the remainder of the post I will provide instructions on how to configure and install OpenCV 3.0 and python 2.7+ on Ubuntu. I have personally tested these instructions on Ubuntu 14.04, but they should pretty much work on any Debian-based operating system.
A quick note before we get started: Yes, OpenCV 3.0 is indeed compatible with Python 3+. However, the install instructions are slightly different between Python 2.7+ and Python 3+. In an effort to keep each article self-contained and easy to follow, I am creating separate OpenCV 3.0 install tutorials for Python 2.7 and Python 3+. If you would like to use OpenCV 3.0 and Python 3+ on your Ubuntu system, please keep an eye on this blog — I will be posting OpenCV 3.0 and Python 3+ install instructions later this month. But for the time being, let’s stick with Python 2.7.
How to Install OpenCV 3.0 and Python 2.7+ on Ubuntu
UPDATE: The tutorial you are reading now covers how to install OpenCV 3.0 with Python 2.7+ bindings on Ubuntu 14.04. This tutorial still works perfectly, but if you want to install OpenCV on the newer Ubuntu 16.04 with OpenCV 3.1 and Python 2.7 (or Python 3.5) bindings, please use this freshly updated tutorial:
http://www.pyimagesearch.com/2016/10/24/ubuntu-16-04-how-to-install-opencv/
This is the second article in the OpenCV 3.0 install-fest series. Last week we covered how to install OpenCV 3.0 and Python 2.7+ on OSX. Today we are going to perform the same OpenCV 3.0 and Python 2.7 installation, only on the Ubuntu operating system. In general, you should find installing OpenCV 3.0 and Python 2.7+ on Ubuntu much easier than installing on OSX.
Step 1:
Open up a terminal and update the apt–get package manager followed by upgrading any pre-installed packages:
Install OpenCV 3.0 and Python 2.7+ on Ubuntu
Shell
| 1 2 | $ sudo apt–get update $ sudo apt–get upgrade |
Step 2:
Now we need to install our developer tools:
Install OpenCV 3.0 and Python 2.7+ on Ubuntu
Shell
| 1 | $sudoapt–getinstallbuild–essentialcmakegitpkg–config |
The pkg–config is likely already installed, but be sure to include it just in case. We’ll be usingGit to pull down the OpenCV repositories from GitHub. The cmake package is used to configure our build.
Step 3:
OpenCV needs to be able to load various image file formats from disk, including JPEG, PNG, TIFF, etc. In order to load these image formats from disk, we’ll need our image I/O packages:
Install OpenCV 3.0 and Python 2.7+ on Ubuntu
Shell
| 1 | $ sudo apt–get install libjpeg8–dev libtiff4–dev libjasper–dev libpng12–dev |
Step 4:
At this point, we have the ability to load a given image off of disk. But how do we display the actual image to our screen? The answer is the GTK development library, which the highgui module of OpenCV depends on to guild Graphical User Interfaces (GUIs):
Install OpenCV 3.0 and Python 2.7+ on Ubuntu
Shell
| 1 | $sudoapt–getinstalllibgtk2.0–dev |
Step 5:
We can load images using OpenCV, but what about processing video streams and accessing individual frames? We’ve got that covered here:
Install OpenCV 3.0 and Python 2.7+ on Ubuntu
Shell
| 1 | $ sudo apt–get install libavcodec–dev libavformat–dev libswscale–dev libv4l–dev |
Step 6:
Install libraries that are used to optimize various routines inside of OpenCV:
Install OpenCV 3.0 and Python 2.7+ on Ubuntu
Shell
| 1 | $sudoapt–getinstalllibatlas–base–devgfortran |
Step 7:
Install pip , a Python package manager:
Install OpenCV 3.0 and Python 2.7+ on Ubuntu
Shell
| 1 2 | $ wget https://bootstrap.pypa.io/get–pip.py $ sudo python get–pip.py |
Step 8:
Install virtualenv and virtualenvwrapper. These two packages allow us to create separate Python environments for each project we are working on. While installing virtualenv andvirtualenvwrapper is not a requirement to get OpenCV 3.0 and Python 2.7+ up and running on your Ubuntu system, I highly recommend it and the rest of this tutorial will assume you have them installed!
Install OpenCV 3.0 and Python 2.7+ on Ubuntu
Shell
| 1 2 | $sudopipinstallvirtualenvvirtualenvwrapper $sudorm–rf~/.cache/pip |
Now that we have virtualenv and virtualenvwrapper installed, we need to update our~/.bashrc file:
Install OpenCV 3.0 and Python 2.7+ on Ubuntu
Shell
| 1 2 3 | # virtualenv and virtualenvwrapper export WORKON_HOME=$HOME/.virtualenvs source /usr/local/bin/virtualenvwrapper.sh |
This quick update will ensure that both virtualenv and virtualenvwrapper are loaded each time you login.
To make the changes to our ~/.bashrc file take effect, you can either (1) logout and log back in, (2) close your current terminal window and open a new one, or preferably, (3) reload the contents of your ~/.bashrc file:
Install OpenCV 3.0 and Python 2.7+ on Ubuntu
Shell
| 1 | $source~/.bashrc |
Lastly, we can create our cv virtual environment where we’ll be doing our computer vision development and OpenCV 3.0 + Python 2.7+ installation:
Install OpenCV 3.0 and Python 2.7+ on Ubuntu
Shell
| 1 | $ mkvirtualenv cv |
Step 9:
As I mentioned above, this tutorial covers how to install OpenCV 3.0 and Python 2.7+ (I’ll have a OpenCV 3.0 + Python 3 tutorial available later this month), so we’ll need to install our Python 2.7 development tools:
Install OpenCV 3.0 and Python 2.7+ on Ubuntu
Shell
| 1 | $sudoapt–getinstallpython2.7–dev |
Since OpenCV represents images as multi-dimensional NumPy arrays, we better install NumPy into our cv virtual environment:
Install OpenCV 3.0 and Python 2.7+ on Ubuntu
Shell
| 1 | $ pip install numpy |
Step 10:
Our environment is now all setup — we can proceed to change to our home directory, pull down OpenCV from GitHub, and checkout the 3.0.0 version:
Install OpenCV 3.0 and Python 2.7+ on Ubuntu
Shell
| 1 2 3 4 | $cd~ $gitclonehttps://github.com/Itseez/opencv.git $cdopencv $gitcheckout3.0.0 |
Update (3 January 2016): You can replace the 3.0.0 version with whatever the current release is (as of right now, it’s 3.1.0 ). Be sure to check OpenCV.org for information on the latest release.
As I mentioned last week, we also need the opencv_contrib repo as well. Without this repository, we won’t have access to standard keypoint detectors and local invariant descriptors (such as SIFT, SURF, etc.) that were available in the OpenCV 2.4.X version. We’ll also be missing out on some of the newer OpenCV 3.0 features like text detection in natural images:
Install OpenCV 3.0 and Python 2.7+ on Ubuntu
Shell
| 1 2 3 4 | $ cd ~ $ git clone https://github.com/Itseez/opencv_contrib.git $ cd opencv_contrib $ git checkout 3.0.0 |
Again, make sure that you checkout the same version for opencv_contrib that you did foropencv above, otherwise you could run into compilation errors.
Time to setup the build:
Install OpenCV 3.0 and Python 2.7+ on Ubuntu
Shell
| 1 2 3 4 5 6 7 8 9 | $cd~/opencv $mkdirbuild $cdbuild $cmake–DCMAKE_BUILD_TYPE=RELEASE\ –DCMAKE_INSTALL_PREFIX=/usr/local\ –DINSTALL_C_EXAMPLES=ON\ –DINSTALL_PYTHON_EXAMPLES=ON\ –DOPENCV_EXTRA_MODULES_PATH=~/opencv_contrib/modules\ –DBUILD_EXAMPLES=ON.. |
Update (3 January 2016): In order to build OpenCV 3.1.0 , you need to set –DINSTALL_C_EXAMPLES=OFF (rather than ON ) in the cmake command. There is a bug in the OpenCV v3.1.0 CMake build script that can cause errors if you leave this switch on. Once you set this switch to off, CMake should run without a problem.
Notice how compared to last week our CMake command is substantially less verbose and requires less manual tweaking — this is because CMake is able to better automatically tune our install parameters (at least compared to OSX).
Now we can finally compile OpenCV:
Install OpenCV 3.0 and Python 2.7+ on Ubuntu
Shell
| 1 | $ make –j4 |
Where you can replace the 4 with the number of available cores on your processor to speedup the compilation.
Here’s an example of OpenCV 3.0 compiling on my system:
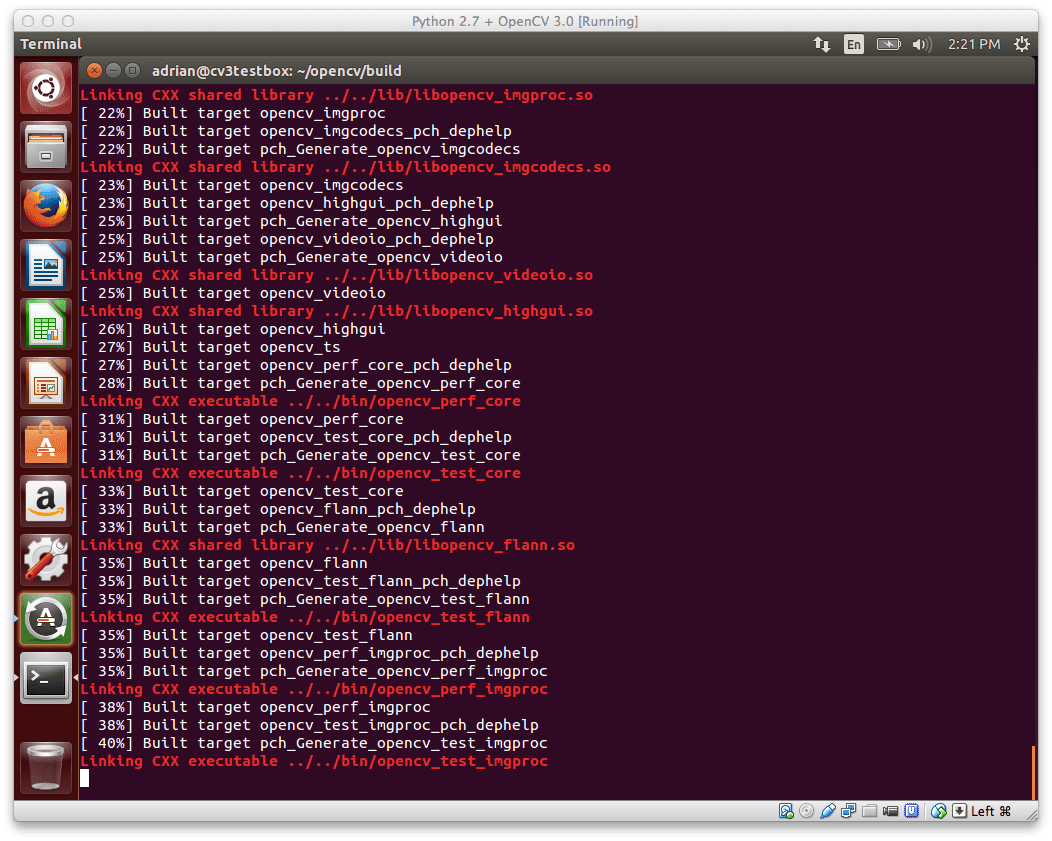
Figure 1: OpenCV 3.0 with Python 2.7+ support compiling on my Ubuntu 14.04 system.
Assuming that OpenCV compiled without error, you can now install it on your Ubuntu system:
Install OpenCV 3.0 and Python 2.7+ on Ubuntu
Shell
| 1 2 | $sudomakeinstall $sudoldconfig |
Step 11:
If you’ve reached this step without an error, OpenCV should now be installed in /usr/local/lib/python2.7/site–packages
However, our cv virtual environment is located in our home directory — thus to use OpenCV within our cv environment, we first need to sym-link OpenCV into the site–packages directory of the cv virtual environment:
Install OpenCV 3.0 and Python 2.7+ on Ubuntu
Shell
| 1 2 | $ cd ~/.virtualenvs/cv/lib/python2.7/site–packages/ $ ln –s /usr/local/lib/python2.7/site–packages/cv2.so cv2.so |
Step 12:
Congratulations! You have successfully installed OpenCV 3.0 with Python 2.7+ bindings on your Ubuntu system!
To confirm your installation, simply ensure that you are in the cv virtual environment, followed by importing cv2 :
Install OpenCV 3.0 and Python 2.7+ on Ubuntu
Shell
| 1 2 3 4 5 | $workoncv $python >>>importcv2 >>>cv2.__version__ ‘3.0.0’ |
Here’s an example of demonstrating the OpenCV 3.0 and Python 2.7+ install on my own Ubuntu machine:
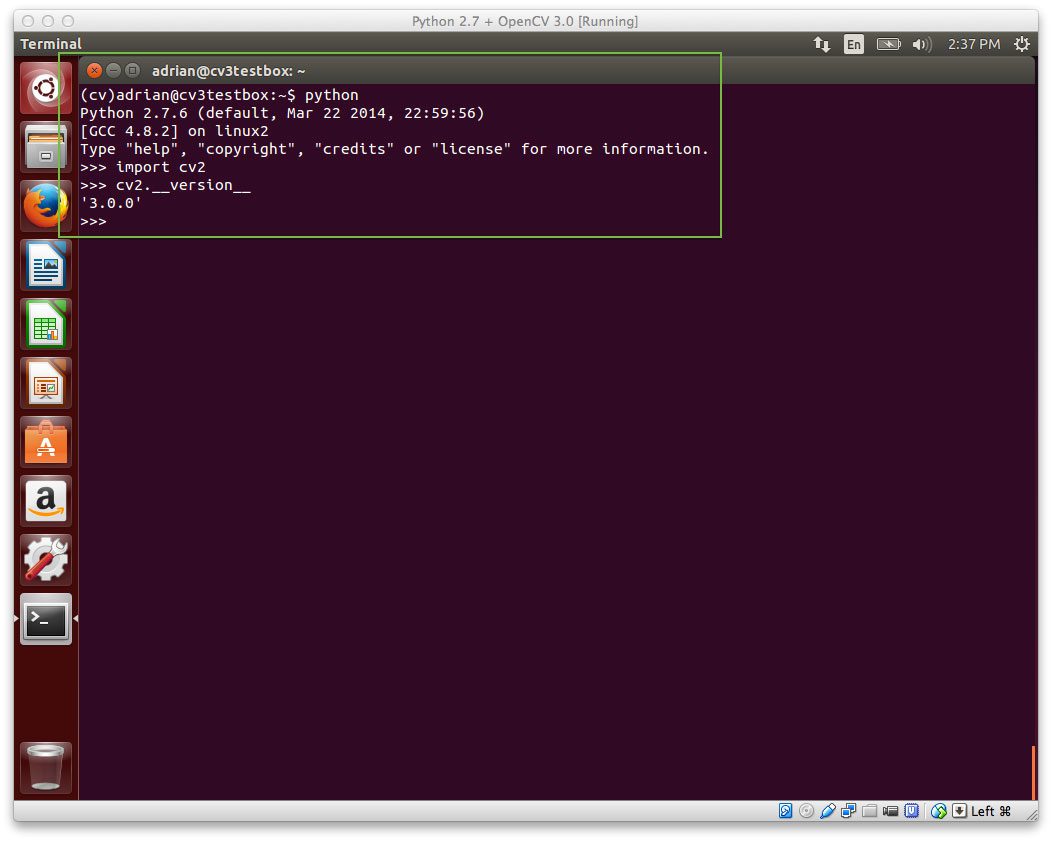
Figure 2: OpenCV 3.0 with Python 2.7+ bindings has been successfully installed on Ubuntu!
Step 13:
Now that OpenCV has been configured and installed, let’s build a quick Python script to detect the red game cartridge in the image named games.jpg below:

Figure 3: Our goal is to detect the red game cartridge (on the right) in this image.
Open up your favorite editor, create a new file, name it find_game.py , and insert the following code:
Install OpenCV 3.0 and Python 2.7+ on Ubuntu
Python
| 1 2 3 4 5 6 7 8 9 10 11 12 13 14 15 16 17 18 19 20 21 22 23 24 25 | # import the necessary packages import numpy as np import cv2 # load the games image image = cv2.imread(“games.jpg”) # find the red color game in the image upper = np.array([65, 65, 255]) lower = np.array([0, 0, 200]) mask = cv2.inRange(image, lower, upper) # find contours in the masked image and keep the largest one (_, cnts, _) = cv2.findContours(mask.copy(), cv2.RETR_EXTERNAL, cv2.CHAIN_APPROX_SIMPLE) c = max(cnts, key=cv2.contourArea) # approximate the contour peri = cv2.arcLength(c, True) approx = cv2.approxPolyDP(c, 0.05 * peri, True) # draw a green bounding box surrounding the red game cv2.drawContours(image, [approx], –1, (0, 255, 0), 4) cv2.imshow(“Image”, image) cv2.waitKey(0) |
You’ll also need to download the games.jpg image and place it in the same directory as yourfind_game.py file. Once the games.jpg file has been downloaded, you can execute the script via:
Install OpenCV 3.0 and Python 2.7+ on Ubuntu
Shell
| 1 | $pythonfind_game.py |
Assuming that you have downloaded the games.jpg image and placed it in the same directory as our find_game.py script, you should see the following output:
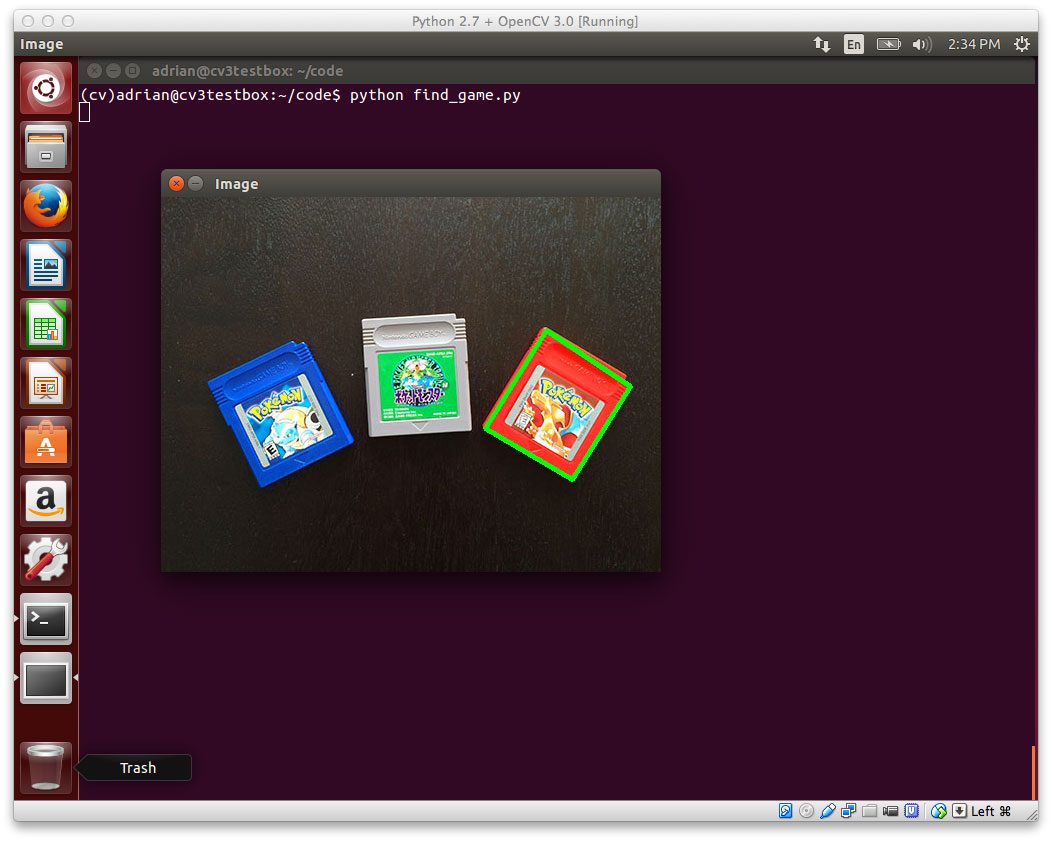
Figure 4: We have successfully detected the red game cartridge in the image!
Notice how our script was able to successfully detect the red game cartridge in the right portion of the image, followed by drawing a green bounding box surrounding it.
Obviously this isn’t the most exciting example in the world — but it has demonstrated that we have OpenCV 3.0 with Python 2.7+ bindings up and running on our Ubuntu system!
So, what’s next?
Congrats! You have a brand new, fresh install of OpenCV on your Ubuntu system — and I’m sure you’re just itching to leverage your new install to build some awesome computer vision apps.
But I’m also willing to bet that you’re just getting started learning computer vision and OpenCV, and you’re probably feeling a bit confused and overwhelmed on where exactly to start.
Personally, I’m a big fan of learning by example, so a good first step would be to read this blog post on accessing your webcam with OpenCV. This tutorial details the exact steps you need to take to (1) capture photos from your webcam and (2) access the raw video stream.
And if you’re really interested in leveling-up your computer vision skills, you should definitely check out my book, Practical Python and OpenCV + Case Studies. My book not only covers the basics of computer vision and image processing, but also teaches you how to solve real world computer vision problems including face detection in images and video streams, object tracking in video, and handwriting recognition.

So let’s put your fresh install of OpenCV on your Ubuntu system to good use — just click hereto learn more about the real-world projects you can solve using your new OpenCV install + Practical Python and OpenCV .
Summary
To celebrate the OpenCV 3.0 release, I am working my way through OpenCV 3.0 and Python 2.7/Python 3.4 installation instructions on OSX, Ubuntu, and the Raspberry Pi.
Last week I covered how to install OpenCV 3.0 and Python 2.7+ on OSX.
And today we covered how to install OpenCV 3.0 with Python 2.7 bindings on Ubuntu. I have personally tested these instructions on my own Ubuntu 14.04 machine, but they should work on any Debian-based system.
Next week we’ll continue the install-fest and hop back to OSX — this time installing OpenCV 3.0 and Python 3!
This will be the first time we’ve used Python 3 on the PyImageSearch blog, so you won’t want to miss it!
And please consider subscribing to the PyImageSearch Newsletter by entering your email address in the form below. As we work through the OpenCV install-fest, I’ll be sending out updates as each new OpenCV 3.0 + Python install tutorial is released!